How to connect your Chromebook to a projector/monitor or other peripheral device?
Due to its portability, simplicity of use, and affordability, Chromebooks have grown in popularity in educational settings in the current digital era. With their numerous features and functionalities, these portable computers are effective teaching and learning tools for both students and teachers. Connecting a Chromebook to a projector, monitor, or other peripheral devices may be a problem for some users. Be at ease! We will coach you through the easy steps in this tutorial to ensure a seamless connection. By doing this, you will be able to utilize your Chromebook’s full capability in any situation.
Understanding the Ports
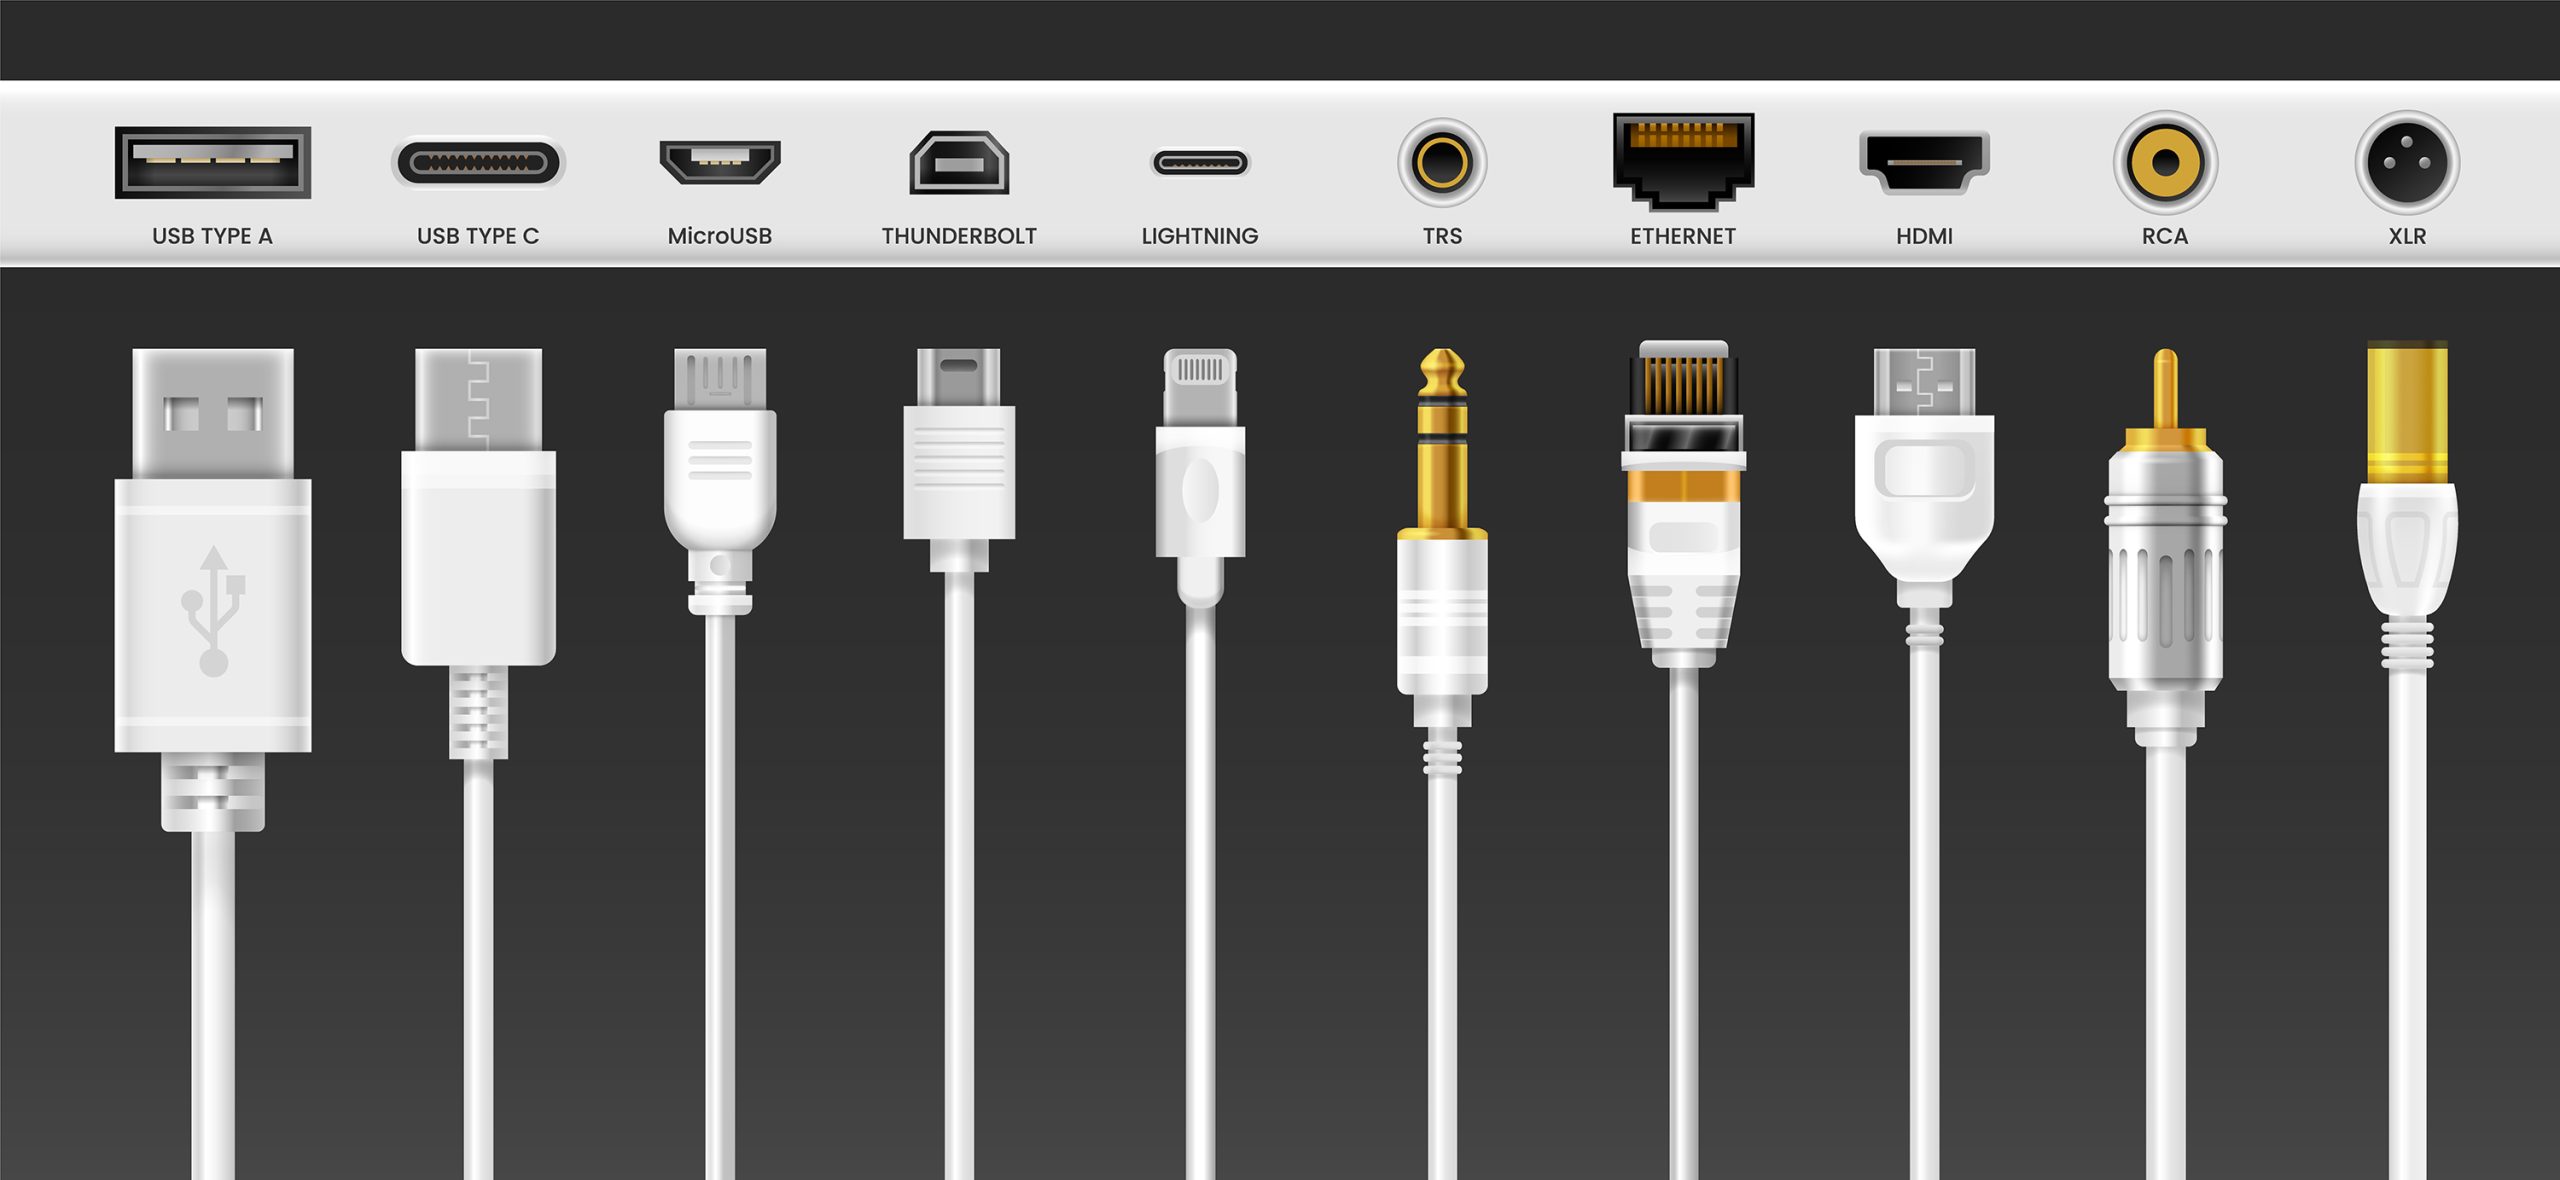
It’s helpful to know your Chromebook’s ports before beginning the instructions. The ports that are most often utilized are:
- USB Type-C: Most Chromebooks include USB Type-C connectors. It can convey data, charge batteries, and output images on a display, among other things.
- HDMI Port: Since it can be found on many projectors, monitors, and TVs, an HDMI port is a popular option for connecting devices.
- USB Type-A: Typical peripheral devices that can be connected utilizing the USB Type-A connection include external keyboards and mouse.

Connecting a projector or monitor
Step 1: Check the connections of your Chromebook and projector/monitor. Check that you have all of the necessary cables. Most Chromebooks offer video-capable USB Type-C ports.
Step 2: Find the appropriate cable. You’ll need a USB Type-C to HDMI or USB Type-C to VGA cable if both your Chromebook and projector/monitor have USB Type-C connectors.
Step 3: Connect one end of the cable to the Chromebook’s USB Type-C connector and the other end to the HDMI or VGA connection on the projector/monitor.
Step 4: Turn on the projector/monitor and select an input source (HDMI or VGA).
Step 5: Your Chromebook should immediately detect the external monitor. If not, enable display output by hitting the “Expand” or “Mirror” display mode keys (usually “F4”).
Interfacing with Other Peripheral Devices
Step 1: For devices that connect through USB Type-A, such as keyboards or mice, just plug the USB cable into the Chromebook’s USB Type-A port.
Step 2: Depending on the available ports, use a USB Type-C to USB Type-A converter or cable to connect your Chromebook to an external storage device, such as a USB flash drive or an external hard drive.
Step 3: To link wireless peripherals, such as Bluetooth-enabled keyboards or mouse, switch on your Chromebook’s Bluetooth and follow the manufacturer’s instructions.

Changing Display Options
After successfully connecting your Chromebook to an external monitor, you may wish to tweak the display settings for a more enjoyable experience:
Step 1: In the bottom-right corner of your Chromebook’s screen, click on the time.
Step 2: Click the gear icon to open “Settings.”
Step 3: In the “Device” section, click on “Displays.”
Step 4: From here, you may change the screen resolution, orientation, and mirroring options.
Connecting your Chromebook to a projector, monitor, or other auxiliary device expands your options, especially in educational contexts. Whether you need to present a project to the class, collaborate on a larger screen, or use specialist peripherals, the method is easy and painless. Understanding the different ports and following the simple processes we’ve provided will allow you to fully utilize the capabilities of your Chromebook. This will enhance your learning experience overall.
Remember that technology is really a tool, and after you’ve mastered it, you’ll be free to concentrate on what truly matters: expanding your knowledge and fearlessly embracing new educational opportunities. Have a good time learning on your Chromebook!


